Easy 5-Petal Gumpaste Flower

I just discovered a very simple yet quite lovely gumpaste flower to do.  It’s perfect to fill the space between big flowers on a cake/cupcake.  Hope you enjoy these easy steps, and please don’t forget to share your work with me.

Equipment and Material for One Flower

IMG_3293

  • white gumpaste
  • 5-petal cutter
  • 10cm wire
  • ball tool
  • pointed ball tool
  • rolling pin
  • foam board

How-to

IMG_3294   IMG_3295

1. Roll the white gumpaste to about 1-2 mm thickness, leaving a small stub of 5 mm in the middle.

IMG_3296   IMG_3297

2. Cut the rolled gumpaste with the 5-petal cutter by positioning the stub in the middle.

IMG_3298   IMG_3299   IMG_3300

3. Gently roll the edge and the middle of each petal with the ball tool to form a slight curve.

IMG_3301

4. Bend one end of the wire into a small hook.

IMG_3302

5. Put the wire through the middle of the flower until the hook is inside the stub.

IMG_3303   IMG_3304

6.  Use you fingers to roll the stub into cone shape along the wire.

IMG_3305   IMG_3306

7. Use the pointed ball tool to make a small hole in the middle of the flower.

IMG_3307

8. Roll the white gumpaste into a tiny ball and put it in the hole.

IMG_3373

There you have a finished 5-petal flower.  Very easy and pretty lovely as well!

Hydrangea How-to

Just like how you arrange real flowers, you need some little flowers to fill in the gap.  I find Hydrangeas are very versatile as their range of colours and shape go along well with lots of bigger flowers.  Even better, they are pretty on their own, too.  

I love to prepare my Hydrangeas in a bunch of two or three so that the stem will help them not to be blinded by bigger, taller flowers like roses.  Enjoy!

1. Make a small round gum paste (about 3 mm. in diameter) in the colour you want.  In this case I chose light pink.  Cut wire no. 28 into about 10 cm. long.

photo 1

2. Dip the tip of the wire into egg white or edible glue and insert the wire into the centre of the gum paste ball.

photo 2

3. Use your forefinger and thumb to roll out the bottom of the ball down along the wire.  Try to make the bottom part as thin as possible.

photo 3

4. Use a cutter tool to mark a small cross on the top of the wired gum paste.

photo 4

5. Roll out the pink gum paste until about 1-2 mm thin.  Use a hydrangea cutter to cut out the shape and vein it by the hydrangea veining silicone.

photo 5

6. Use a small brush to paint the back of the stem with a little bit of egg white.  Then insert the wire into the centre of the veined hydrangea and bring the flower all the way to the stem.  Let dry upside down for at least 1 hour.  

photo 1-1

7. Use floral tape to secure a few flowers together to create ready-to-use bunch.

 photo 2-1 photo 3-1

7. Use edible green dust to add some life-like effect to the flowers.


photo 4-1     

Sweetness for Our Guys

Among my most ordered sugar decorations are cartoon characters, figurines, and girly stuffs, e.g. handbags, accessories, makeup, etc.  Once in a while, a customer would order some male things for her boyfriend.  I find these items a little more difficult as I’m not really family with its appearance and structure.  Yet, it’s fun to make and quite cute in its miniature form.  Here are a few items I’ve done before.  Enjoy!

photo 1-2   photo 3-2

photo 2-3   photo 4-2  photo 2-1   photo 4   photo 3   photo 4-1   photo 5   photo 3-1   photo 2-2   photo 1  photo 1-1   photo 2

Gum Paste Figurine Moulds…Threat or Opportunity?

In decorating my cakes, I’ve gotten quite a lot of compliments on the gum paste figurines that I made.  Customers usually sent back kind words about how they love the decoration.  Some even sent me the photos of their celebration, with my cake and all the people smiling around it.  That just totally made me feel so proud and energised.  It’s the reason I want to get better…to keep improving.  I would feel doubly elated when the compliments came from those who really knew first hand how difficult it actually was to master the skills.  It requires some knowledge about the materials and tools, and it takes a LOT of practice.  Even though I’ve done it for years, I’m still farrrrrr from perfecting it.  I’m always inspired by other cake decorators’ work and try to use what I saw in their work to improve mine.

photo 2   photo 1

Lately I felt a bit threatened when I saw that now there were figurine moulds available in the market for sugar work!  I was literally stunned for one minute with all negative thoughts popping up in my head.  I was worried that now everyone would be able to do the figurines, and mine wouldn’t be appreciated anymore.  The skills that I’ve acquired, the long hours I spent in learning and creating what I can today would just go to waste.  Anyone can make the figurines.  It’ll become just a standard decoration from now on.  Boo…hoo…

photo 4

Fortunately, I’ve gained all my senses back one minute later.  Hang on!  Is it really a threat with such moulds available in the market?  Well, it would certainly make it much easier for other cake decorators to make human figurines.  Will they be able to vary its appearance?  Yes, some skilled decorators will and some won’t.  And what’s so bad about it?  It’s not like all cake decorators would jump at the mould and start making all the same style of figurines for their customers, would they?  There are so many other factors involved here.  Let’s not dwell on the negative points then!

On the positive side, from now on I can make the figurines in much less time than before.  Instead of sculpting each body part from scratch and taking hours to make one finished figurine, now I can make the basic structure in less than 10 minutes then spend the extra time on customising it according to what customers want.  Now my figurines would be able to wear more elaborated clothes and accessories.  I’ll have more time to play with the details.  I’ll even have more time to accept more orders!

Coming to this, I then press the order button for the moulds!  Haha…

photo 5

So, what’s the take away from this story?

An opportunity can be disguised as a threat.  Just don’t panic.  Look at it carefully and see how you can turn it around in your favour.  I’m sure some threats will still be threats even after you look at them from all angles.  The fact that you have taken a good look at those threats already prepare you on how to handle them!  So, in conclusion, just make positivity out of all threats!  Cheers!!

photo 3


P.S. I haven’t tried the mould.  Will do some review once I try it.  😀

Coral Charm Peony How-to

25570623-131808-47888440.jpg

I just saw a similar gum paste peony from Pinterest and wanted to try making one myself. I came up with this easy how-to, which did not result in a very natural-looking flower but a satisfactory version, considering the time and effort. Hope you have fun making an edible flower, like I do.

Materials:


photo 1

Light green gum paste
Light coral gum paste or any color that you want for your petals
18 pieces of wire
Non-edible ready-made yellow stamen
Drop cookie cutter
Rolling pin
Rolling board
Foam board
Pliers
Ball tools
Roller cutter
Floral tape

Instructions:

1. Bend an end of a wire into a hook. Repeat with 3 wires in total.

photo 6
2. Make a droplet from green gum paste to cover the hook. Make a straight line on the droplet.

photo 3   photo 4
3. Roll out the orange gum paste into a thin sheet and cut 15 petals.
4. Insert a wire into the center of each petal.

photo 5
5. Sharpen the edge of the petals with a big ball tool and create ruffles with a small ball tool. Let all parts dry at least 1 hour or overnight.

photo 2-1   photo 1-1
6. Put together the 3 green stamen with floral tape, then put the yellow stamen on the outside.

photo 3-1   photo 5-1
7. Adding the petals one by one, securing with floral tape, to create a natural looking peony.

photo 4-1   photo 2

Playing to Your Strengths

This past week was the week of learning for me! I have’t done this much studying/training in…umm…I think 14 years since I graduated my Masters.

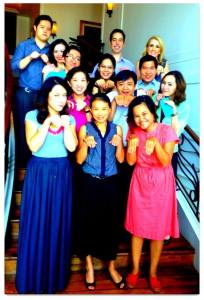
The week began with 4 days of intense training to become an MBTI certified practitioner, starting from 8:45 a.m. until 5:30 p.m. with lots of lecturing, case studies, and homework! I was so physically exhausted every day but, at the same time, surprisingly felt great and emotionally energised! I didn’t know it was possible for your body and mind to go in opposite directions but mine just did.

10357472_682293168504814_4870606961711118518_n

I had one day rest and then attended a 2-day wedding cake class. Totally different subject, right? Haha…I wouldn’t imagine all these happened in one week but they just did! Another thing I didn’t expect was for the wedding cake class to even be more exhausting!!

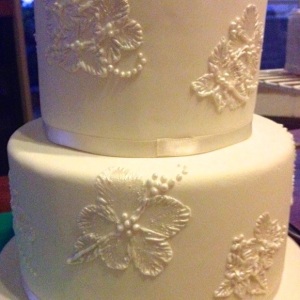
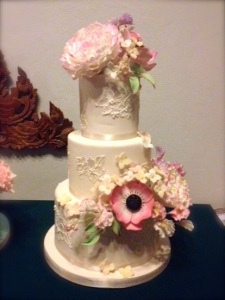
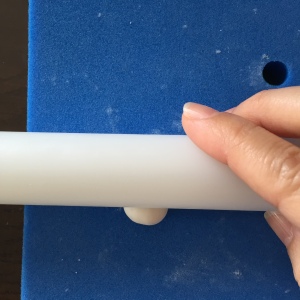
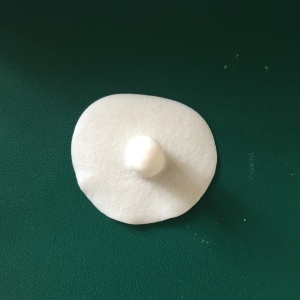
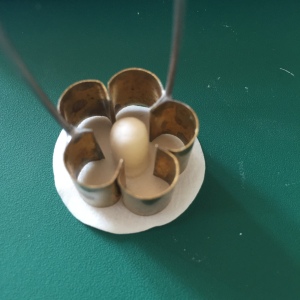
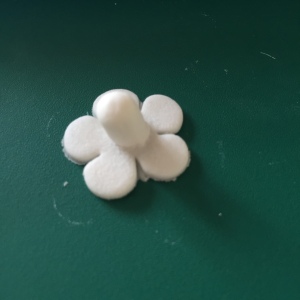
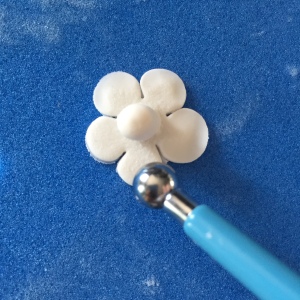
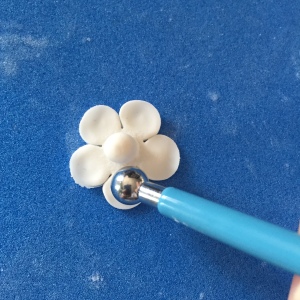
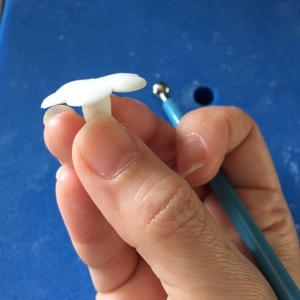
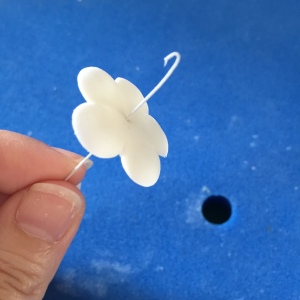
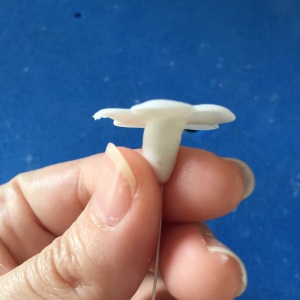
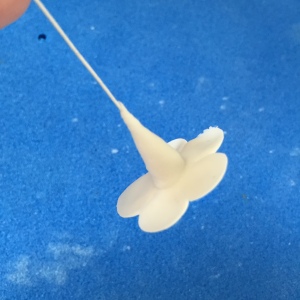
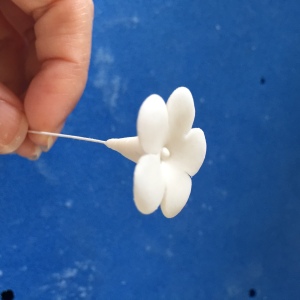
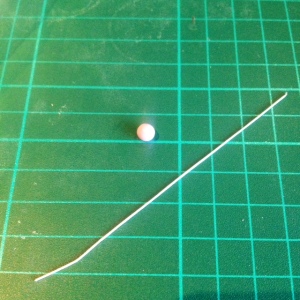
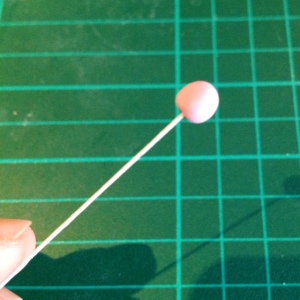
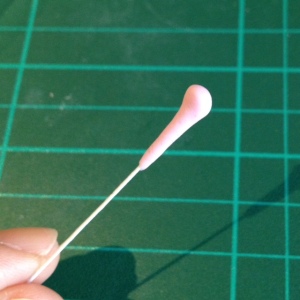
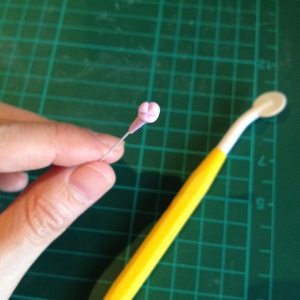
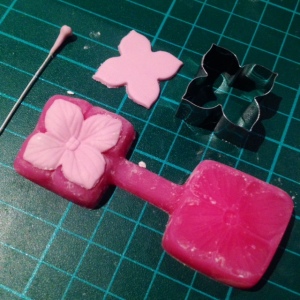
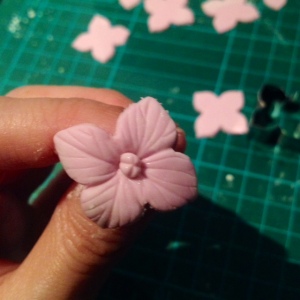
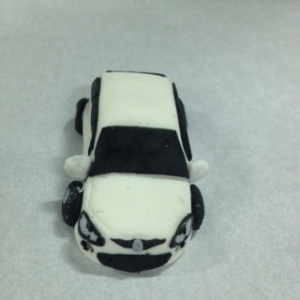
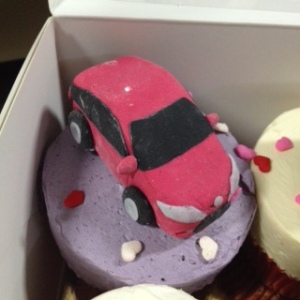
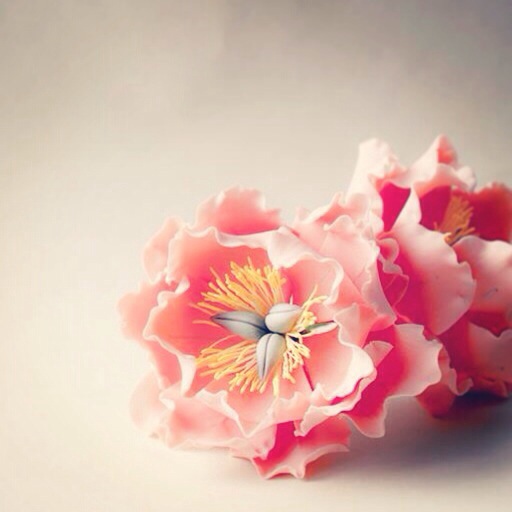
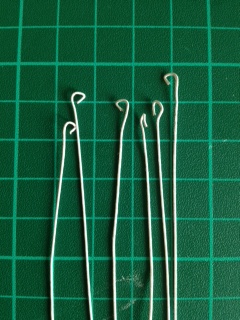
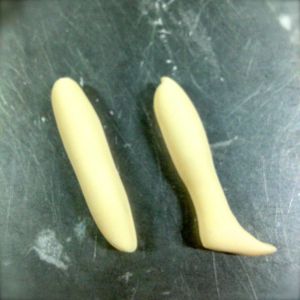
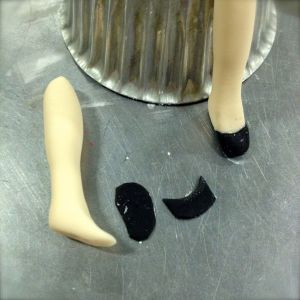
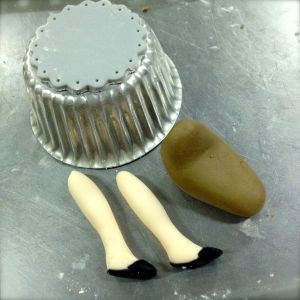
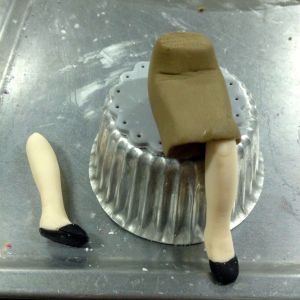
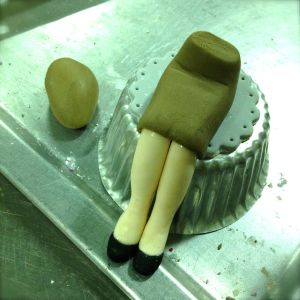
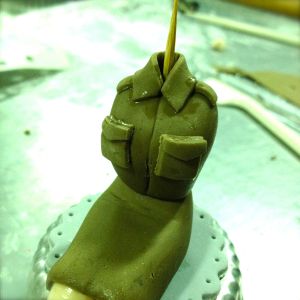
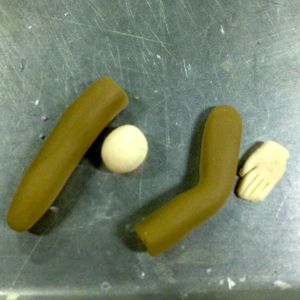
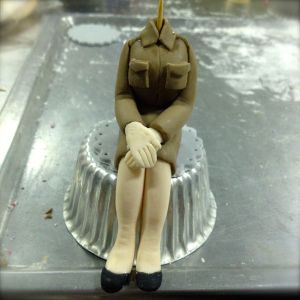
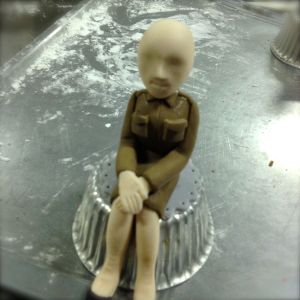
I imagined a friendly atmosphere where you just did your handcraft, some chitchatting…everything so nice and relaxing! My Gosh, I was right except the relaxing part! Two days were hardly enough for so many skills that you learned, starting from covering your 3-tier cake with fondant. Then you prepared parts of the sugar flowers, which were soooo detailed. You also needed quite a number of flowers for the whole cake.

photo 2

I headed home that day with a nasty pain on my right bicep. So hungry, so tired, so blurry-eyed from concentrating on the flower details. By the way, the class started from 8:00 a.m. until 8:00 p.m. We just couldn’t finish everything earlier than that.

photo 1

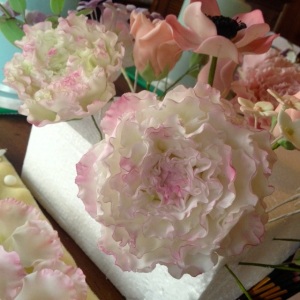
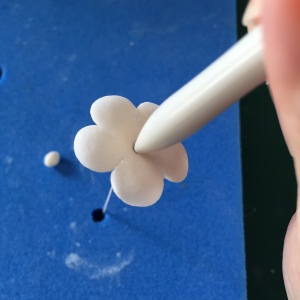
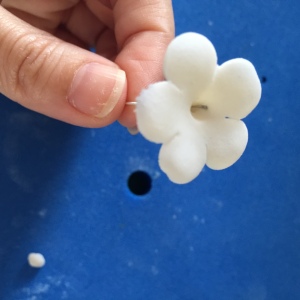
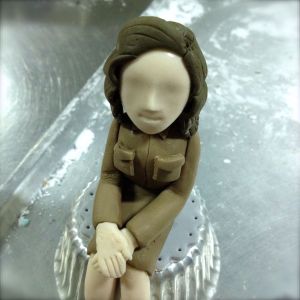
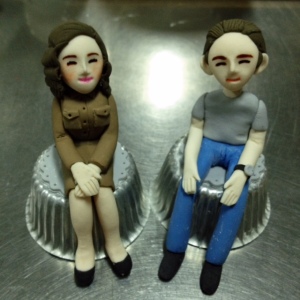
The next day started off with what seemed like a much lighter day.  We assembled the flowers and painted them. I couldn’t imagine how rush we had to be toward the end. The flowers took so much time. Then we had to hand-paint the cake with royal icing and decorate it with our flowers. I hated rushing through art work, but when I looked at the finished cake, I can’t help feeling so proud of what I have accomplished in such a short period of time.

photo 3

Besides all the knowledge and skills I have acquired this week, the most important lesson I learned is,

“When you work to your strength, or do something you love, no matter how hard it is, you still come out of it with positive energy…happiness, pride, and joy…”

photo 4

The next logical step is probably trying to get some return on investment on all those trainings…hahaha… That really does’t sound too joyful for me… 😛

Please share with me when was the last time you learned something new and felt really energised, excited, motivated, etc., and what the effects of such learning to your mind and body?  

Policewoman Figurine How-to


When I first accept orders for gum paste human figurines, I recalled the customers would have only a few expectations, e.g., gender, hair style/colour, and clothing items.  Now when they see that I can follow their instructions, they seem to come back with more and more specifications, e.g., posture and even characteristics.  They would send me the photo of the person they want my figurine to look like and ask me to make it as close to that photo as possible.  Hmm…not that I don’t want to serve my customer well, but sometimes they just have to understand that it’s handcraft, meaning what it looks like depend 100% on my capability!  Anyway, I always try my best and always end up taking way too long to make a figurine than I should!   ;-P

Anyway, I just recently made a Thai policewoman figurine for a customer.  I don’t know how to make a tutorial for it as it’s a very long process and I am not equipped for a VDO tutorial yet.  So, I am going to show you in some sort of step-by-step photos instead.  After all, if you have a chance to make a gum paste figurine, too, you’ll understand that how you do it, i.e., sculpting the gum paste into specific shapes, depends totally on your own skills and style.  Here’s just how I did it.  Enjoy!

1. Shaping the calf and foot.

IMG_9098

2. Putting a shoe on.

IMG_9099

3. Shaping the skirt (hip and thigh).

IMG_9100

4. Gluing the legs to the skirt.

IMG_9101

5. Shaping the shirt (torso).

IMG_9102

6. Adding details to the uniform.

IMG_9104

7. Shaping the arm and hand.

IMG_9105

8. Gluing the arms to the body.

IMG_9107

9. Shaping the head and face.

IMG_9114

10. Adding the hair.

IMG_9115

10. Drawing the face…Done!

 Finished

What’s your idea for the best ‘congrats’ gift?

Image

What would you buy/give to your best friend’s grand opening of her new restaurant/business?

The typical gift for Thai, or probably in other parts of the world as well, would be a lovely, big bouquet.  But won’t that be a little bit unoriginal?  No offense here, but I just wanted to give her something that was actually ‘from me’.  Something that she could just see and identify it with me.

Since I’m a cake decorator, I decided to go for the floral-themed cupcakes.  And, since I should give her some flowers anyway, so why not giving her the edible ones!  The only thing that makes it not such a good idea was that she was opening a dessert bar, and it might look a bit funny to get some dessert for a dessert bar.  Well, I’d been debating with myself for a long while and, as I really couldn’t come up with a better idea, I decided to go for it…with the excuse for myself that it’s not just a dessert, it’s well-decorated box of cupcakes!  Hmm..

Image

I was not sure how she felt about it, but she would be kind enough not to tell me how ridiculous the idea was if she really felt so.  Anyway, I did enjoy making these cupcakes a lot.  At least one of us were happy, right?

I would love to hear from you what would be your gift of choice in this kind of situation?  Perhaps I need to borrow your ideas for my next event!  😉


Gum Paste Frangipani How-to

Image

I know I’m nowhere near being an expert in gum paste flowers.  This is not to teach you but to share with you how I made the gum paste frangipani today.

Frangipani is one of my favourite flowers, with its minimal form and light fragrant.  I just love the way it gives such an elegant yet humble and feminine feeling.

So…here’s how I made this lovely flower today… Image


1. Cut the rolled-out gum paste into 5 drop-shaped petals.

Image

2. Sharpen the edge of each petal.  Give some texture to it and use a toothpick to roll up the left edge.

Image

3. Put the petals together into a fan shape.

Image

4. Round up the 5 petals into a cone shape, overlapping the first and the last petals.  Close up the bottom part and cut out the excess gum paste.

Image

5. Adjust the flowers into desired form then let dry.

Image

6. Colour the dried flower with yellow and plum dust.  Done!!

Easy, isn’t it?

Making the frangipani was just a lovely way to spend my afternoon.  It’s just easy and relaxing enough, and you can’t be too wrong with the end result!

I’d really love to hear about your favourite flowers and, if you are crafters (not necessarily cake decorators), what kind of flowers do you like to make the most?